
Rotary Valve Rebuild Process
Step 1 — Initial Compression Testing
Before any work begins the horn receives a complete initial assessment to ensure a full valve rebuild is actually what the instrument needs. Not every horn that feels stuffy or unresponsive requires a rebuild — sometimes a thorough cleaning or a simple repair is all that stands between a player and a horn that plays its best. The last thing I want is for a customer to spend $1,600 when a $275 cleaning or a simple solder repair would have solved the problem.
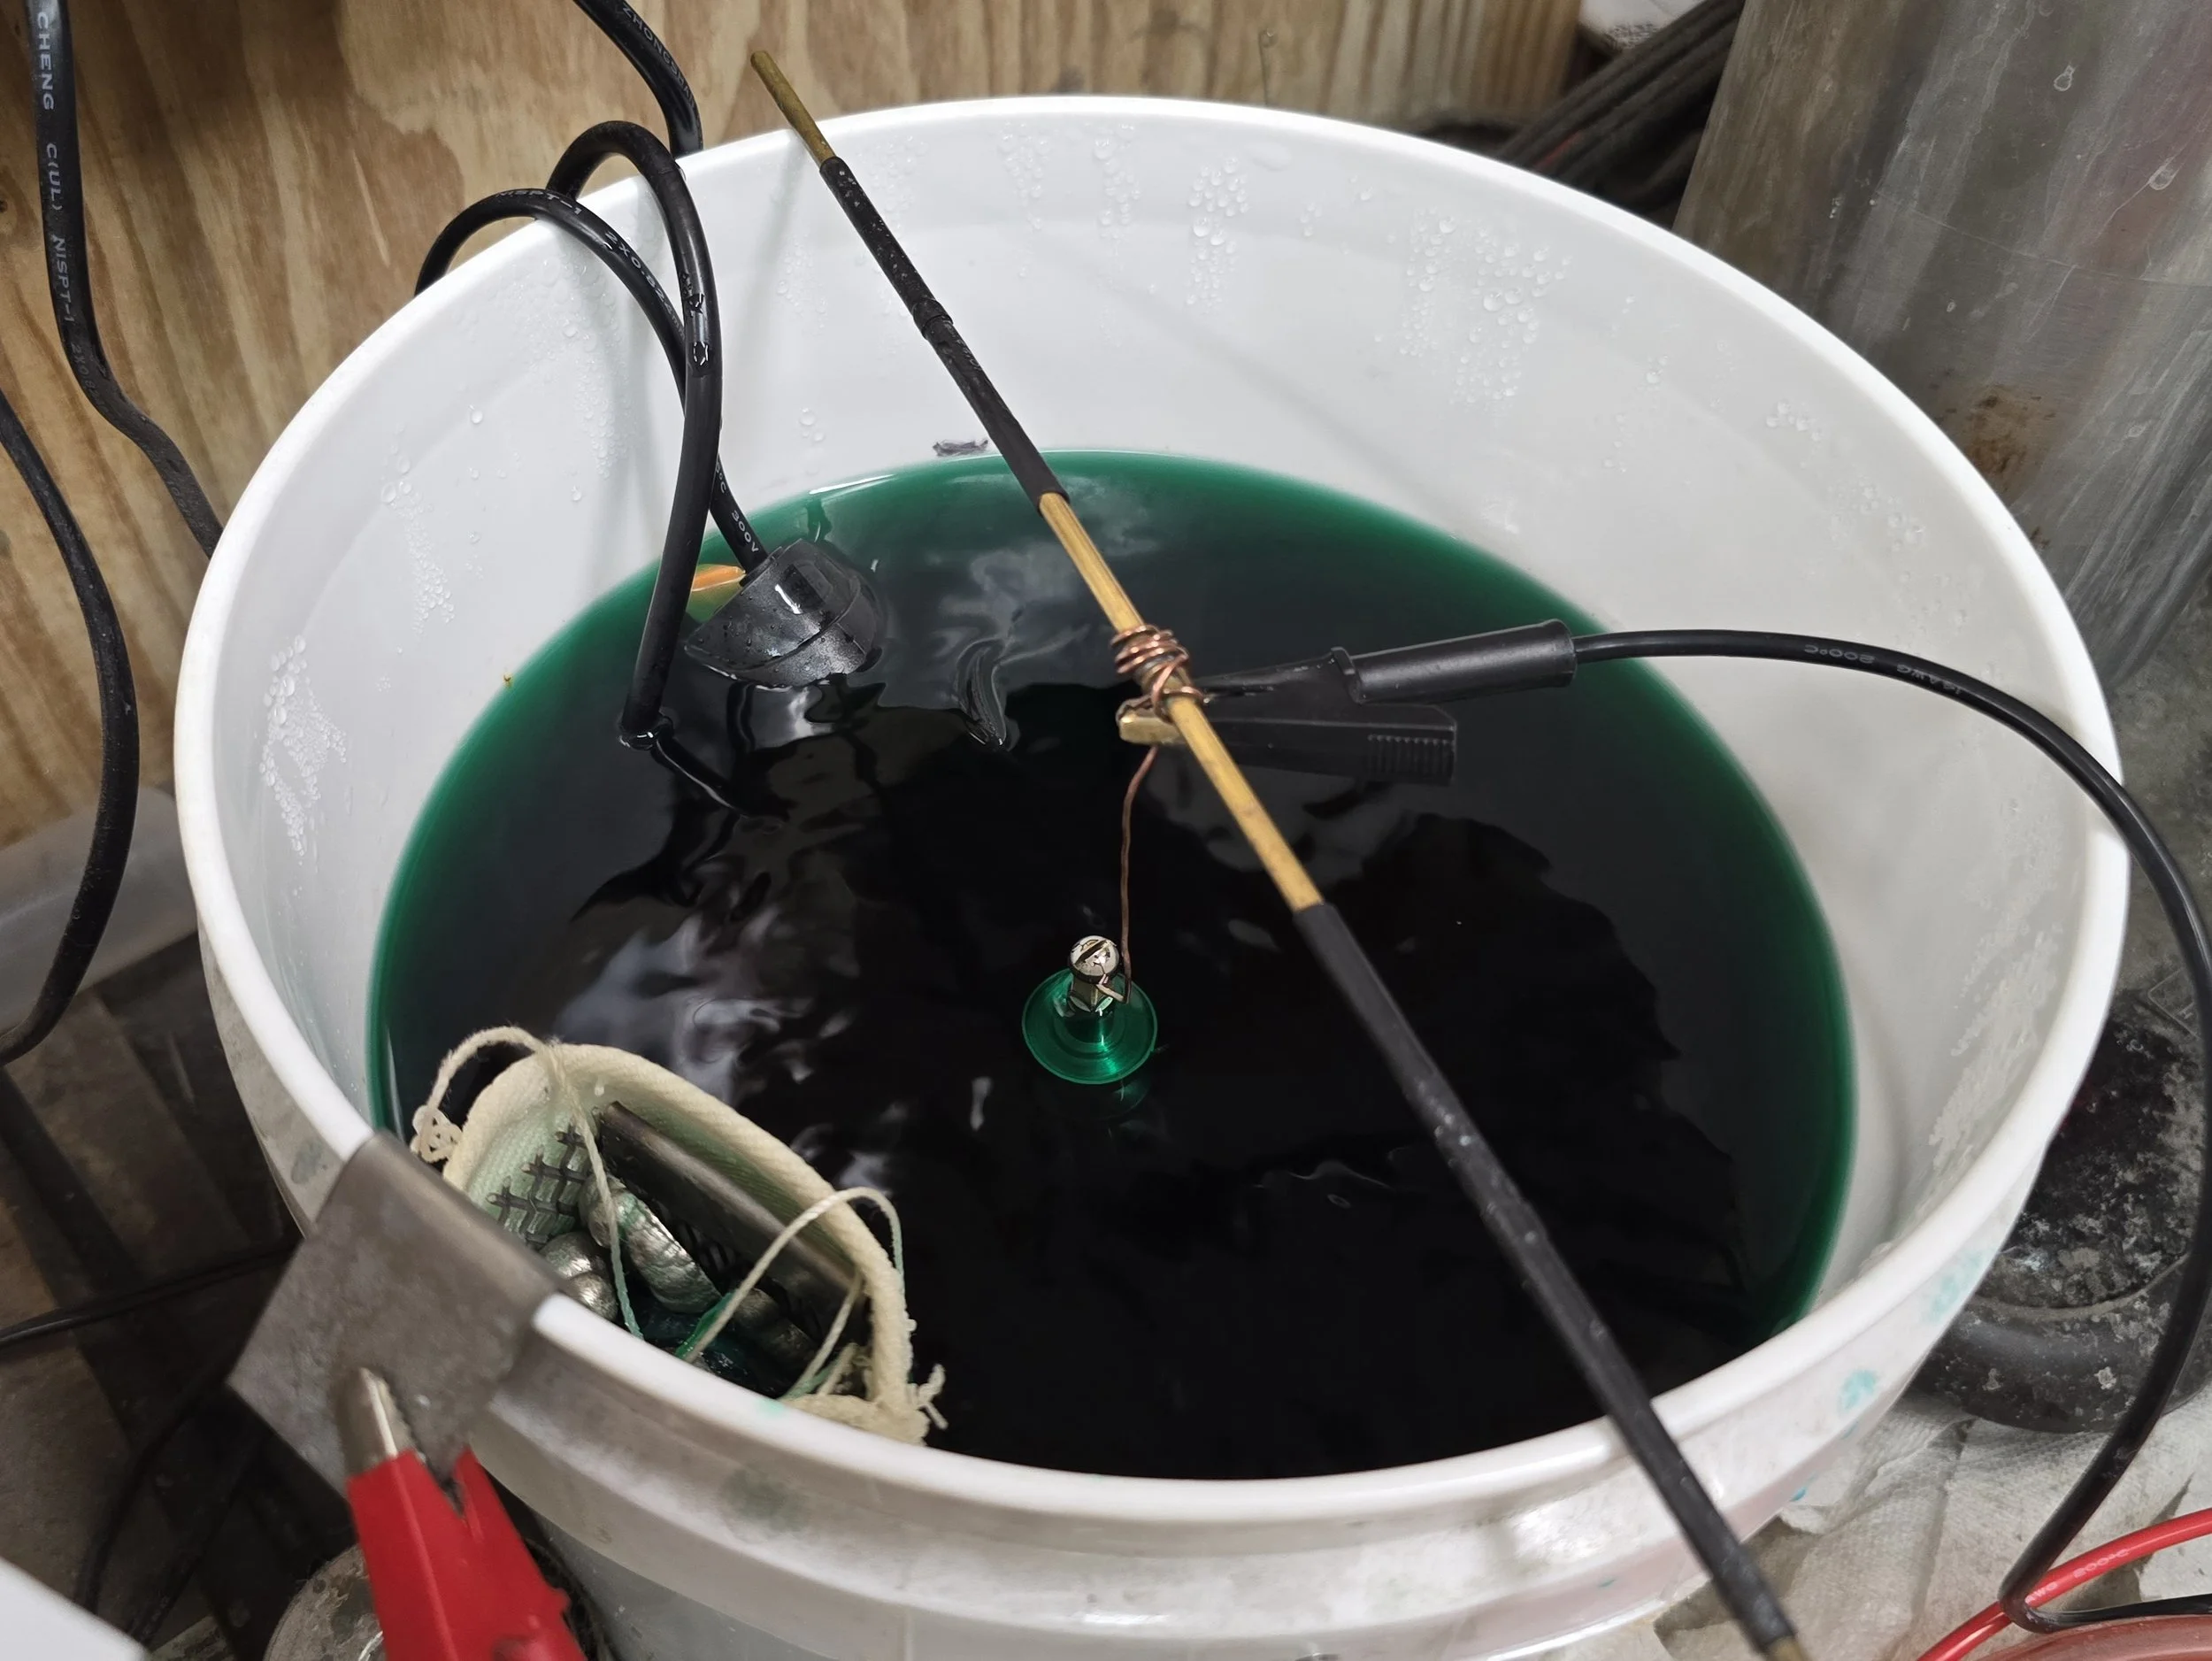
Full Horn Leak Check The bell is plugged and the entire horn is pressurized to check for leaks throughout the instrument. Leaking slides, cracked solder joints, or other issues can produce symptoms that mimic valve problems — identifying these first ensures the right service is recommended for the right reason.
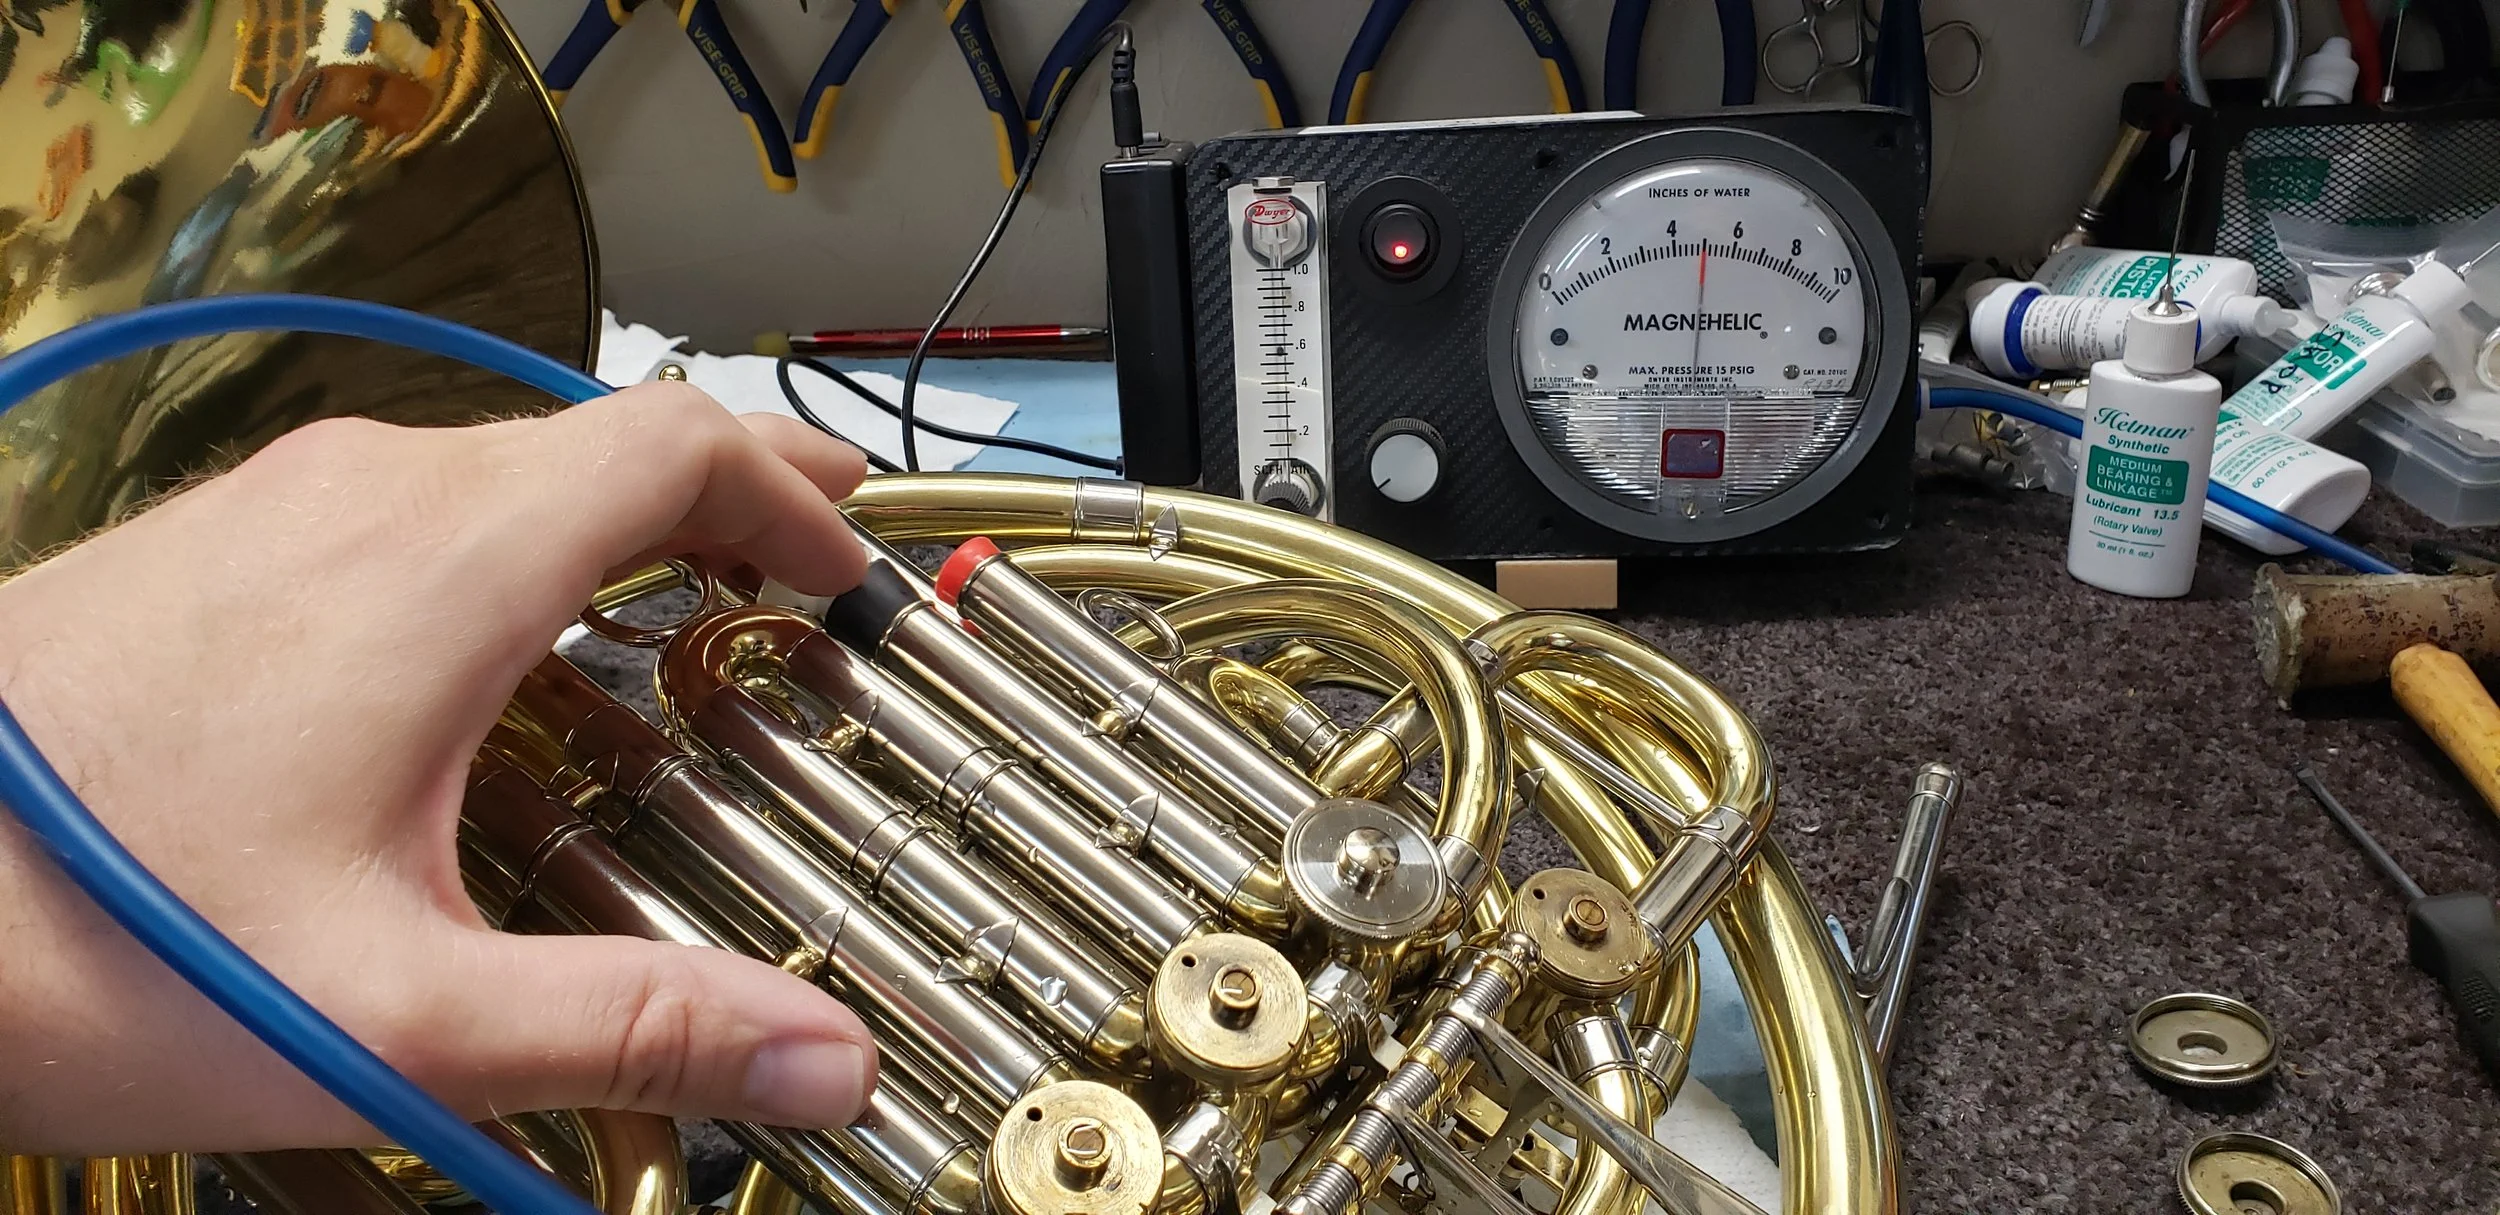
Initial Compression Testing Each rotor is then individually tested using the Leak Pro. Every rotor receives a documented compression reading on a scale of 0 to 8 — where 0 is completely airtight and 8 is wide open. Where possible both the F and Bb sides of each valve are tested independently, giving a complete picture of exactly where the wear is occurring and how severe it is.
These initial readings become part of your instrument's service record and serve as the baseline against which the final results are measured. When your horn is returned to you the before and after numbers tell the whole story — you can see exactly what was wrong and exactly how much improvement was achieved.
If the initial assessment reveals that a rebuild is not necessary I will contact you immediately with an honest recommendation for the appropriate service instead.
Step 2 — Disassembly & Rotor Preparation
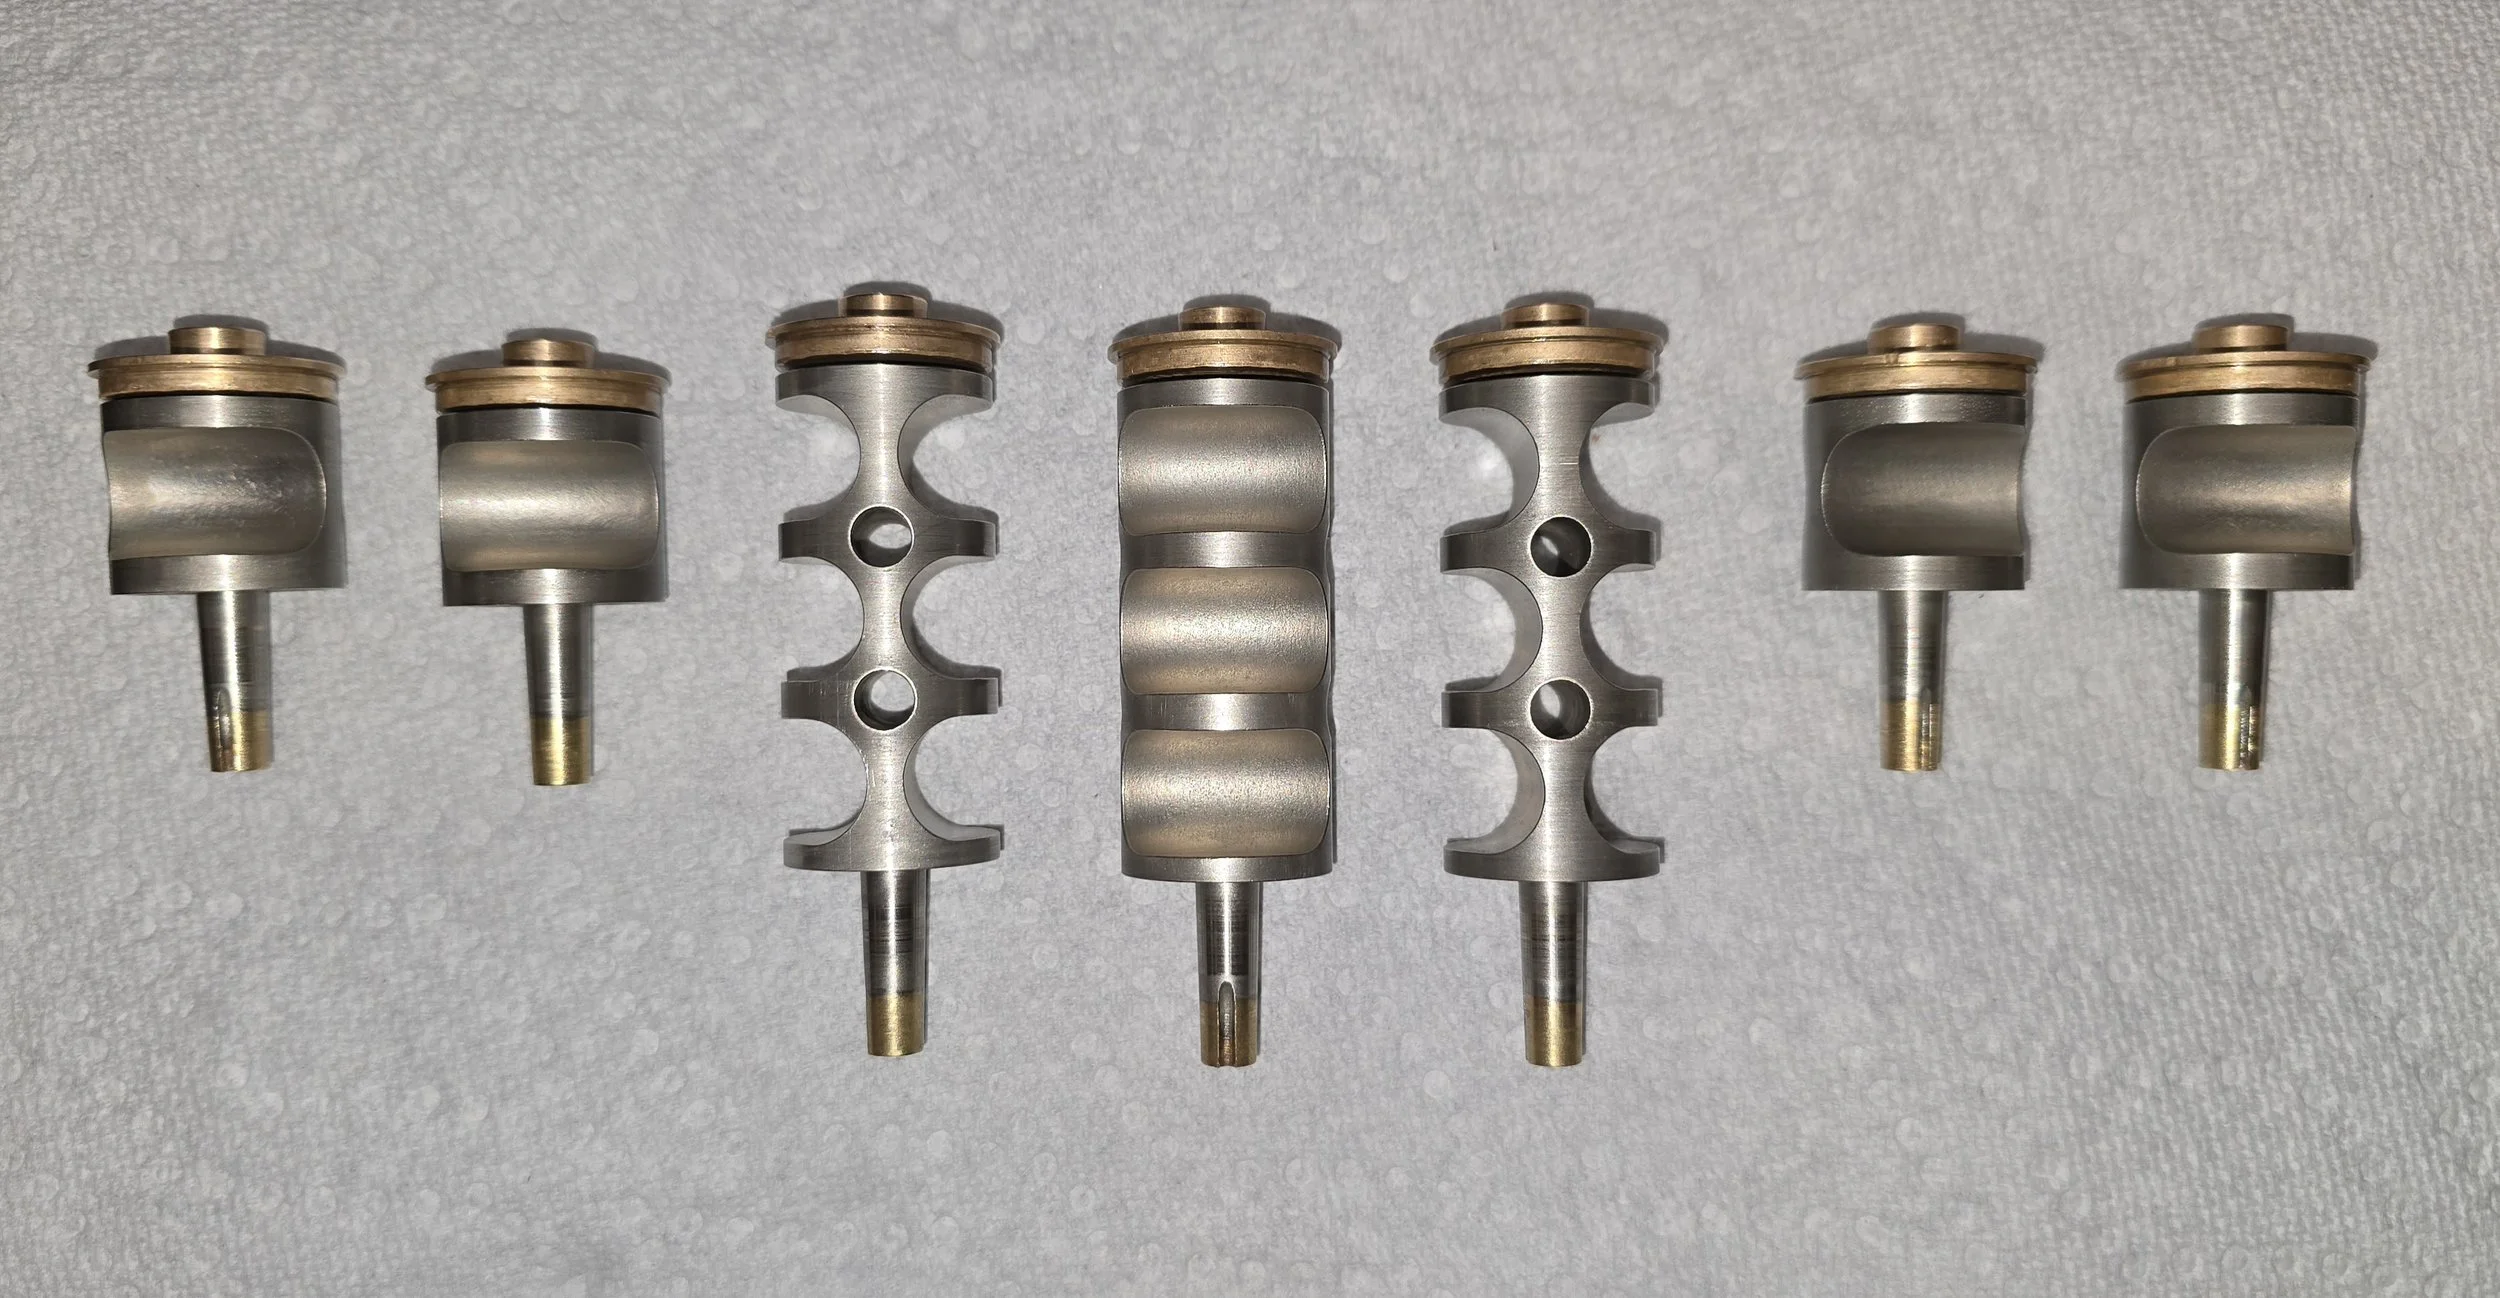
With the initial compression readings documented the horn is fully disassembled and the rotors are prepared for plating through a thorough multi-stage cleaning process.
Each rotor is first acid dipped to remove internal corrosion and mineral deposits, then ultrasonically cleaned to ensure every surface is free of buildup. The rotors are then carefully abraded using Scotch-Brite pads and a specialized 3M abrasive radial brush — what we call the Spider Wheel — which reaches deep into the rotor ports to clean areas that standard cleaning methods simply cannot access.
Finally every rotor is fully degreased, leaving a perfectly clean bare metal surface that is ready to accept the copper and nickel plating. This preparation stage is critical — the quality of the plating is only as good as the surface beneath it. A properly prepared rotor accepts plating evenly and bonds permanently, while a poorly prepared surface will result in plating that fails prematurely.
Step 3 — Electroplating Preparation & Copper Plating
With the rotors mechanically cleaned and degreased the electroplating process begins. This stage requires precision and patience — every step must be performed correctly and in sequence to ensure the plating bonds permanently and performs as intended.
Each rotor is processed individually through the following stages:
Electrocleaning Using a heated electrocleaner the rotor surface is electrically cleaned to remove any remaining traces of dirt and grease at the molecular level — a level of cleanliness that mechanical cleaning alone cannot achieve.
Distilled Water Rinse The rotor is carefully rinsed in distilled water and inspected for water beading. Any beading on the surface indicates the presence of residual oil or contamination — if detected the rotor goes back through the electrocleaning stage before proceeding. There are no shortcuts here.
Acid Surface Activation The rotor is submerged in an acid surface activator bath to chemically prepare the bare metal surface for plating, ensuring maximum adhesion of the copper layer.
Distilled Water Rinse A final distilled water rinse clears the activator before plating begins.
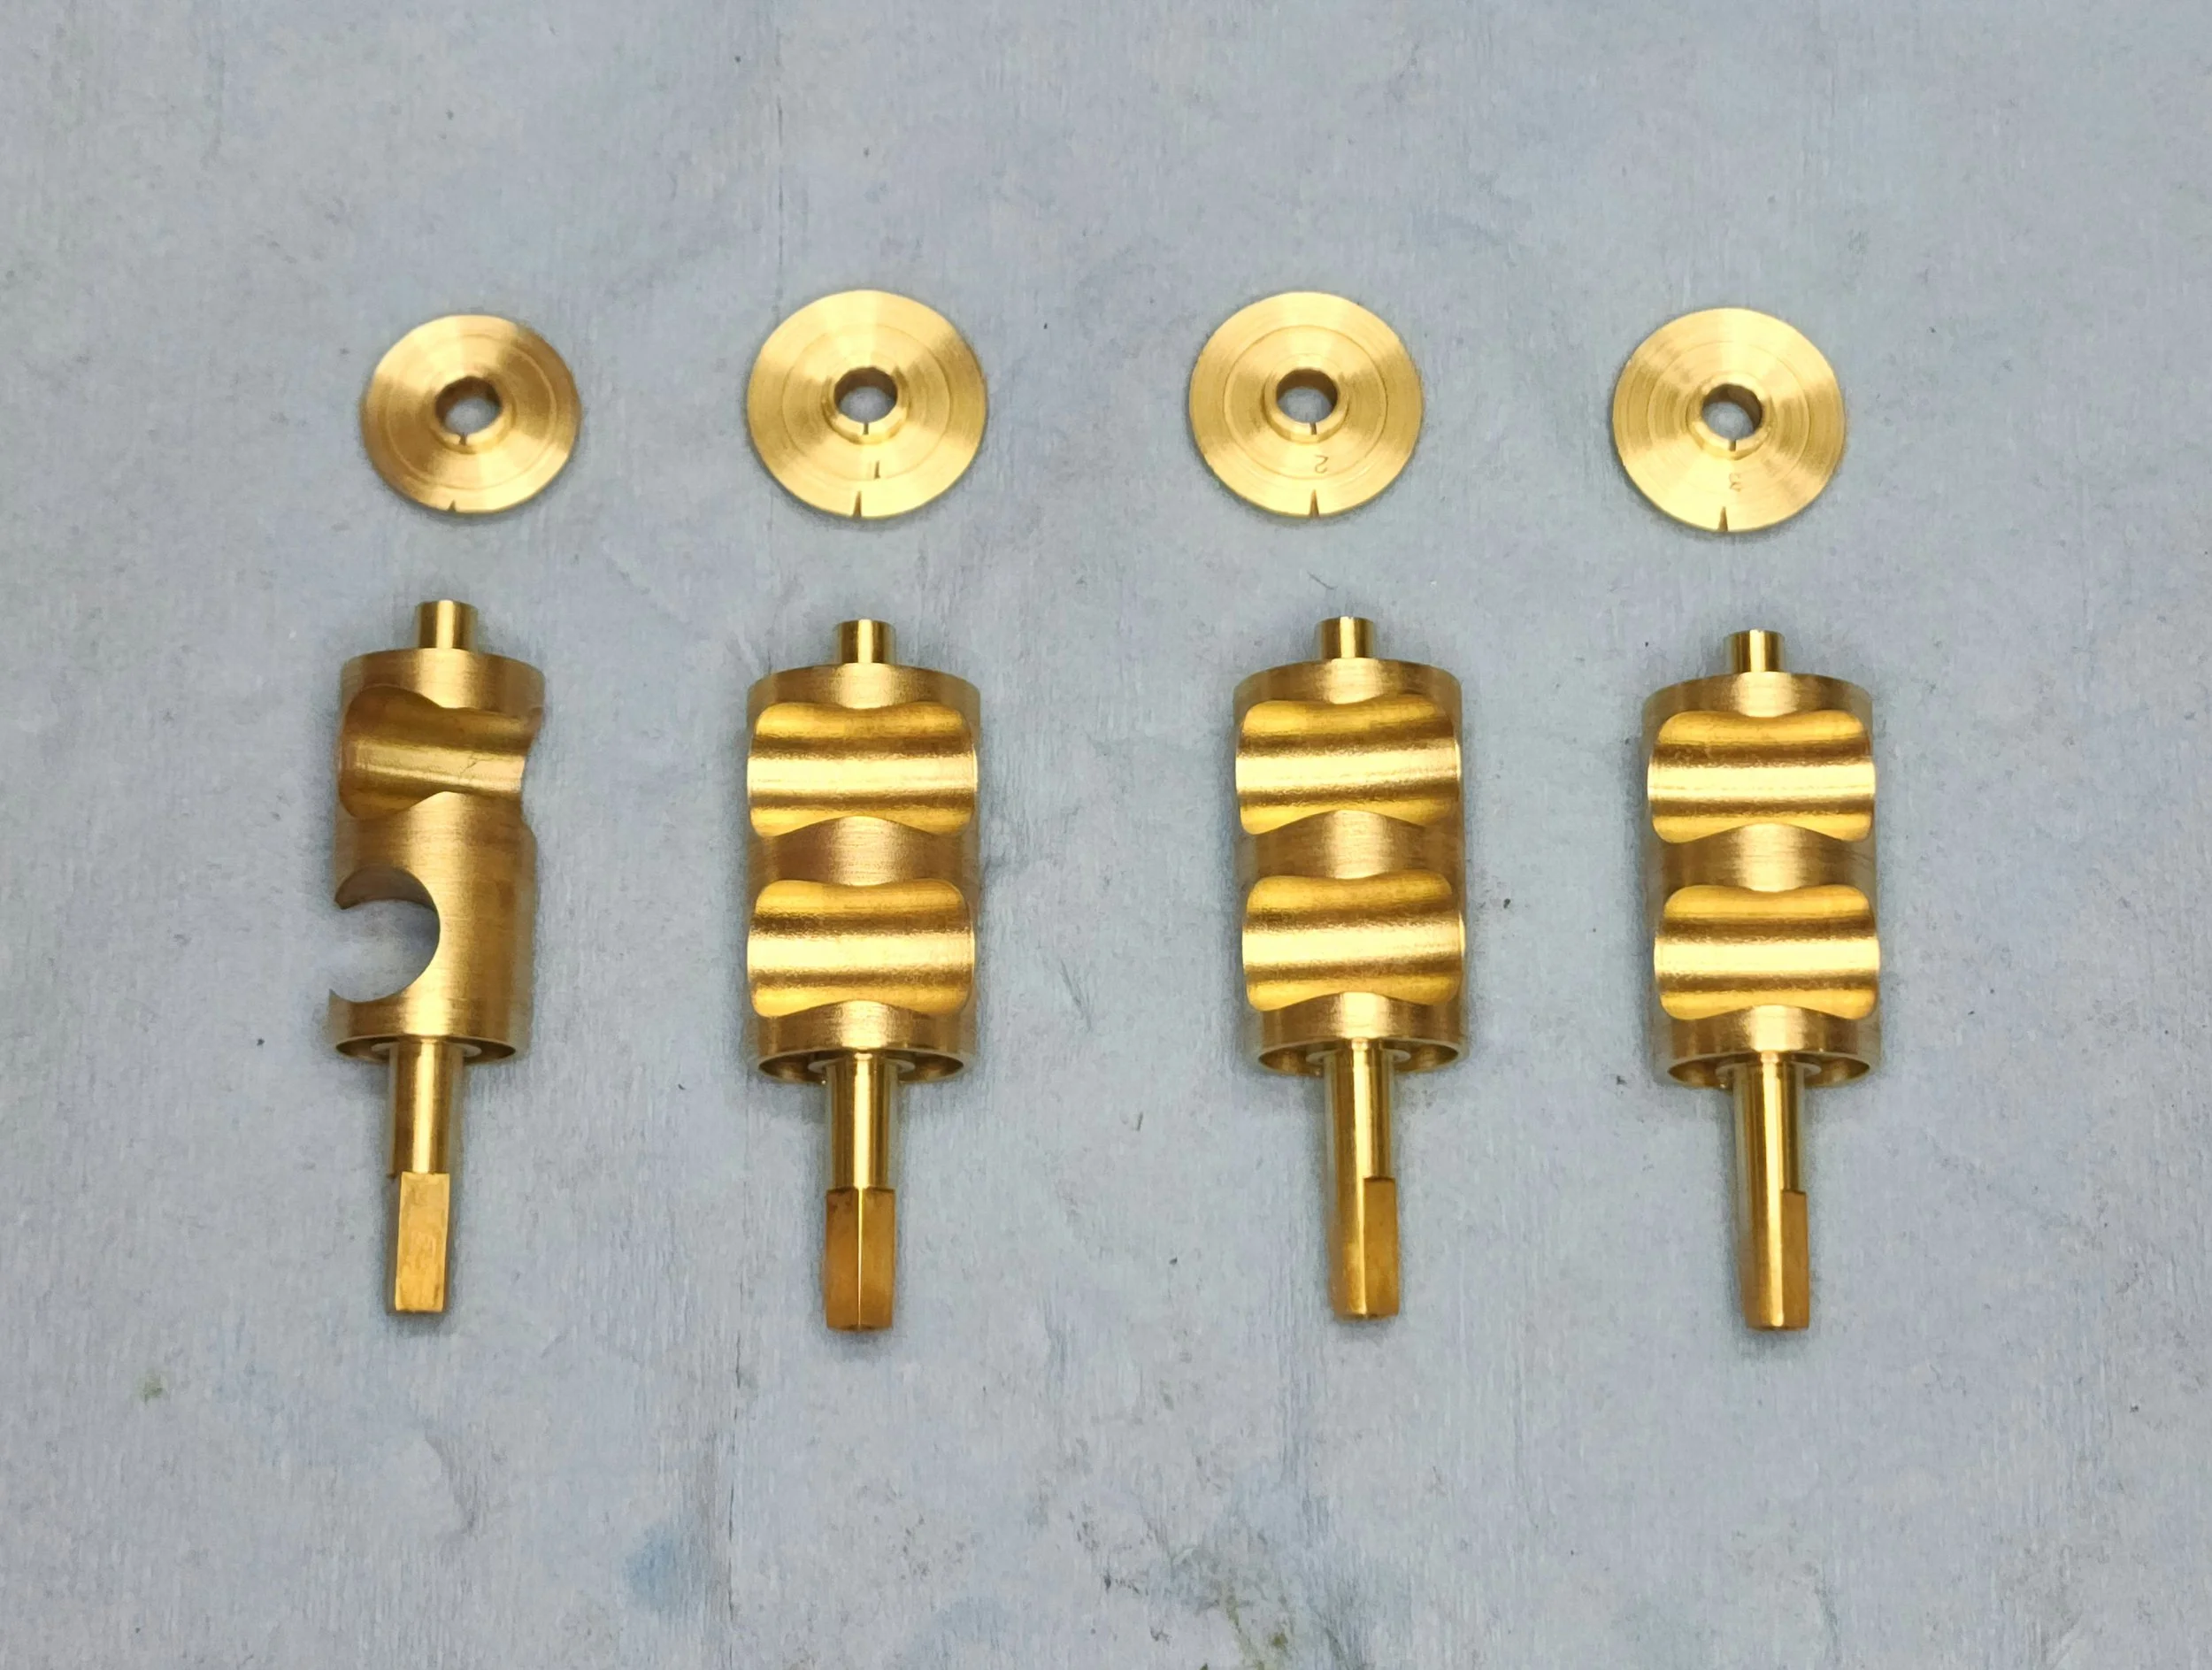
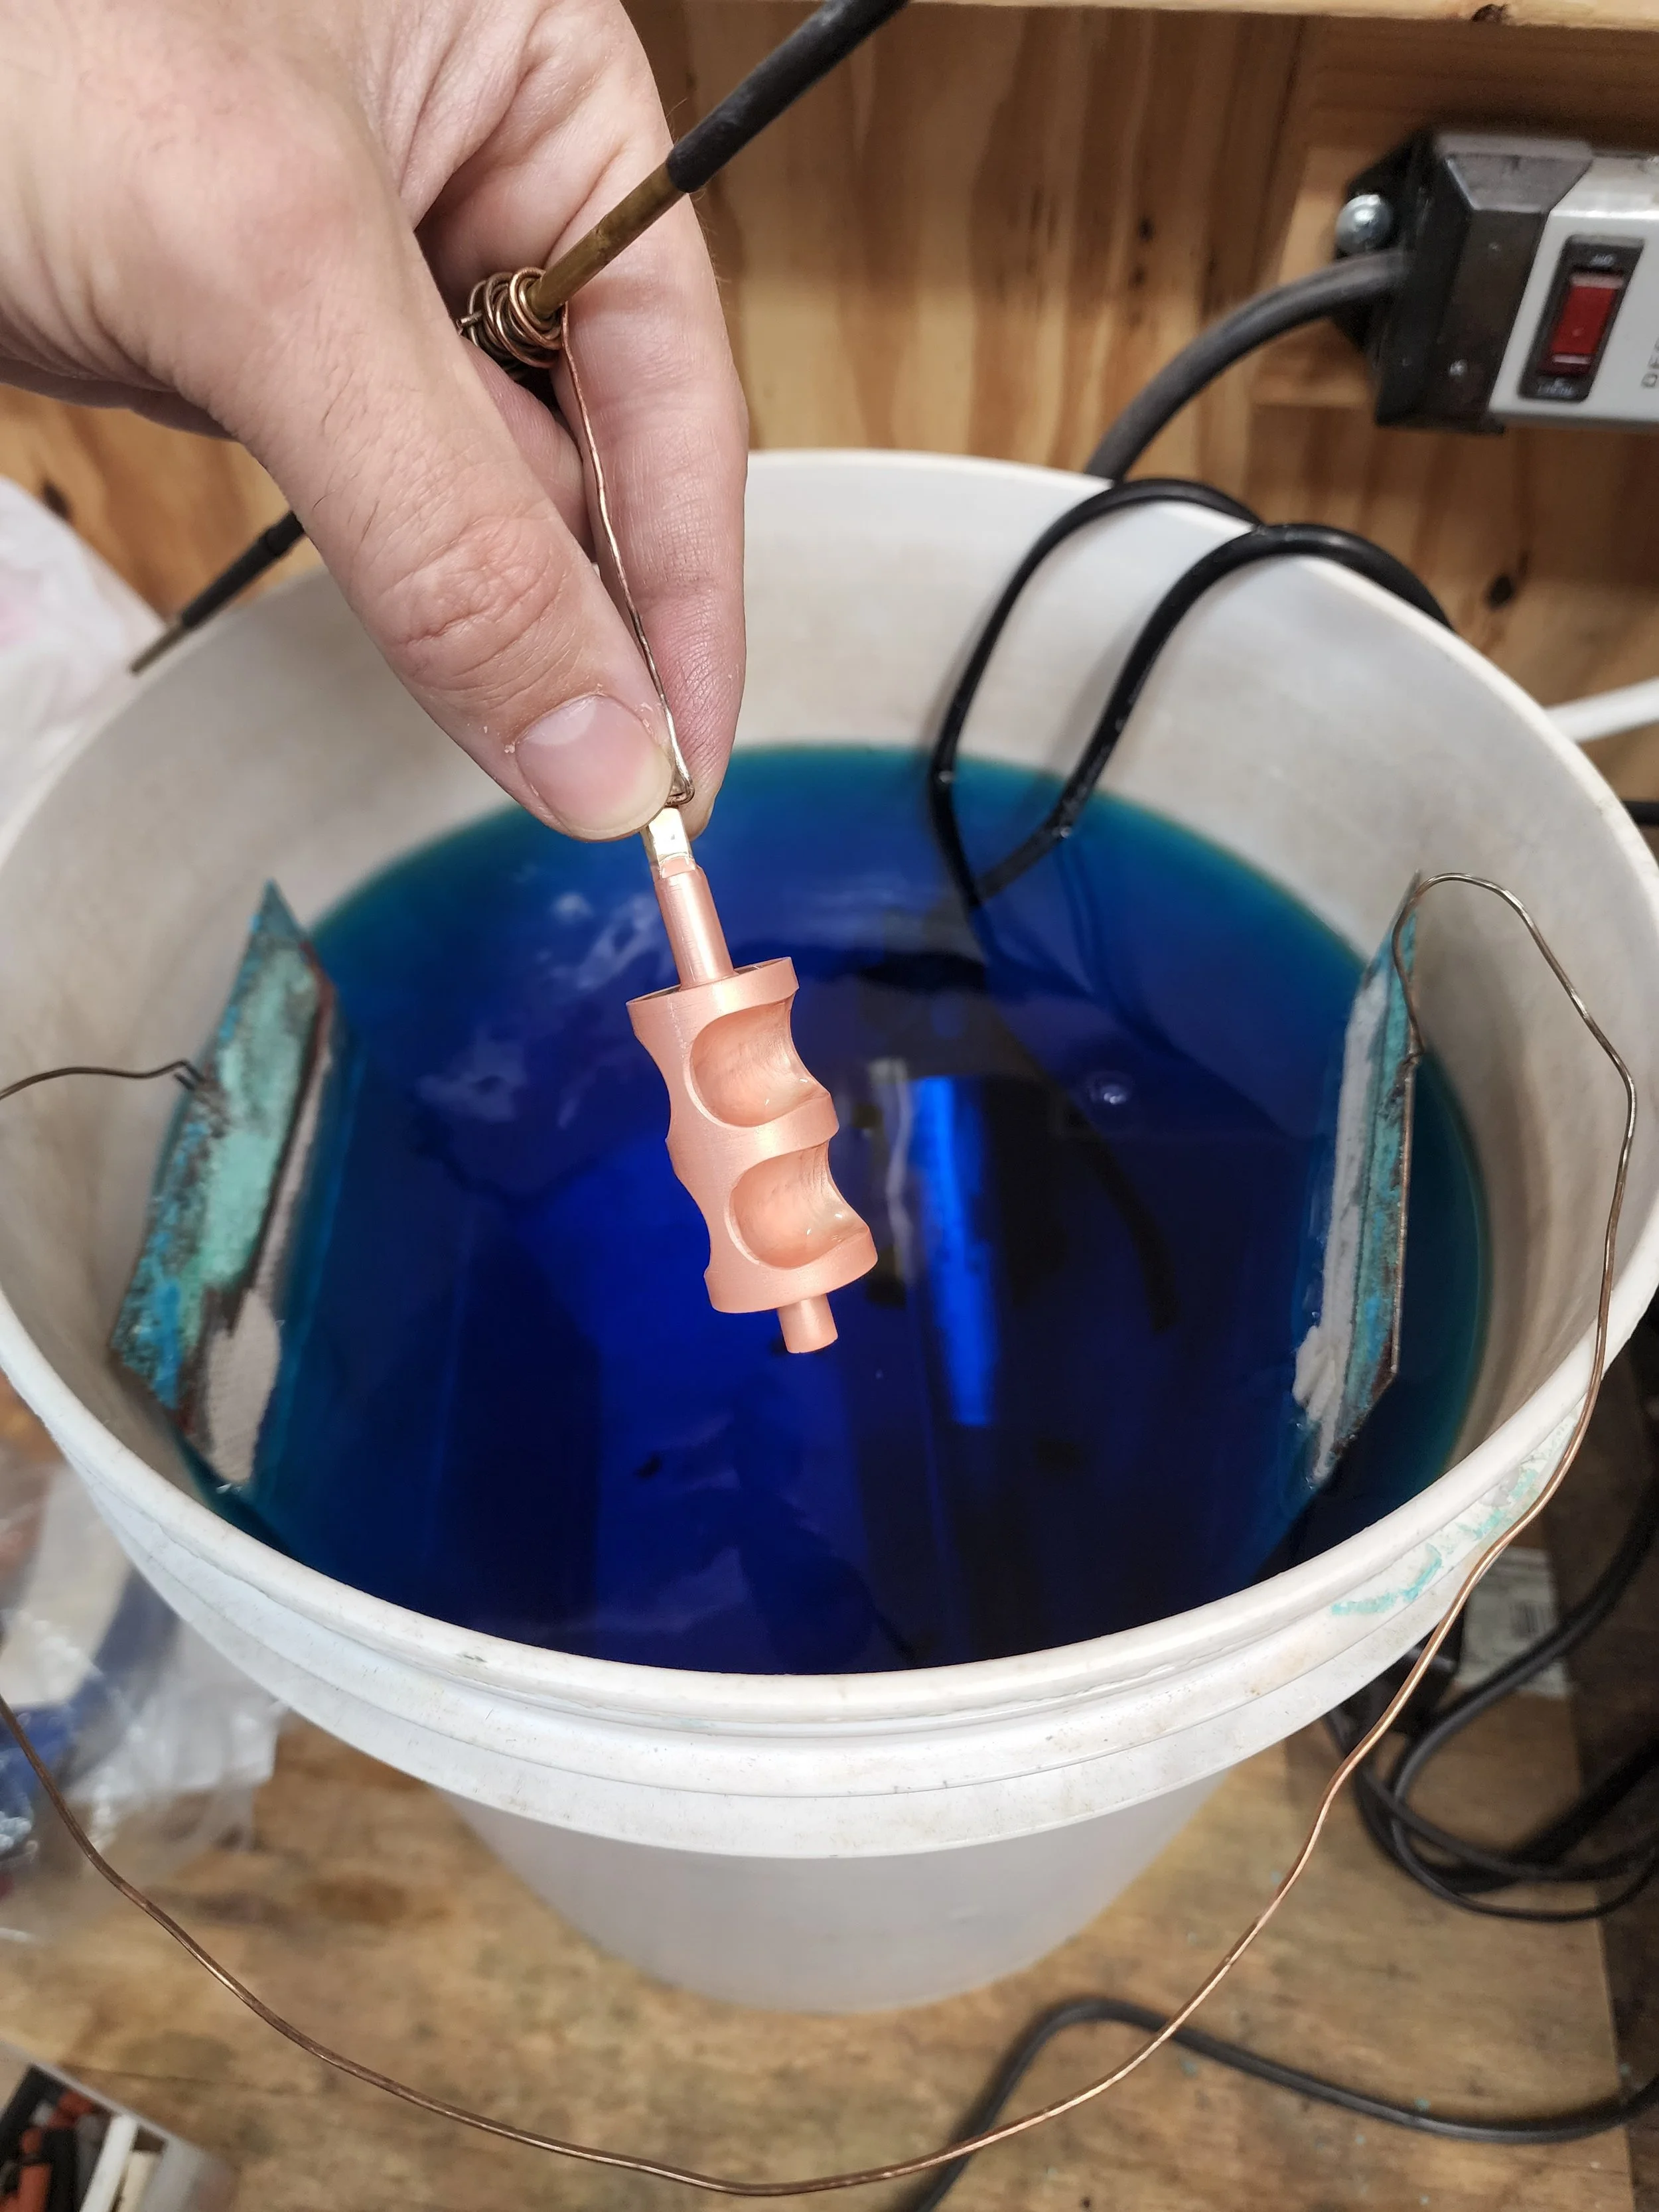
Acid Copper Plating The rotor is carefully submerged in the acid copper plating bath. Precise attention is paid to the depth of submersion — the bearing area is deliberately kept clear of the plating bath to ensure the stop arm continues to fit correctly without requiring any plating removal after the fact.
Step 4 — Fitting & Lapping
Once the copper plating is complete the rotor is rinsed and dried in preparation for fitting. This is where experience becomes the most important tool in the shop.
Lathe Preparation The rotor is carefully secured in the lathe using nylon bushings or custom made Delrin holders specifically designed to protect the bearing surface from damage during machining. The high spots that naturally form along the edges of any electroplated surface are carefully sanded away, and the bearing plate fit is checked before proceeding.
Casing Fit Check The rotor is test fitted in the valve casing. At this point one of three outcomes is possible:
Too loose — the rotor is set aside for another round of copper plating
Too tight — the rotor is carefully lapped using Hetman 900 grit lapping compound until it seats correctly
Correct fit — the rotor moves to the next stage
Lapping & Wear Pattern Inspection After lapping the rotor into the casing, the wear patterns that emerge tell an important story. Low spots on the rotor surface reveal exactly where material has been lost over years of use and mineral wear — and whether additional rounds of copper plating will be required to bring those areas back up to spec.
It is completely normal for a severely worn valve to require multiple rounds of copper plating. Badly damaged or heavily worn rotors may require four rounds or more before all the low spots are fully addressed.
Note: Valves with severe damage or excessive wear beyond normal use may incur an additional fee. This will always be discussed with the customer before any extra work is performed.
A Note on Experience
Much of what happens in this stage cannot be taught from a manual. The fit, the feel, the way a rotor seats in its casing — these are things that only years of hands-on experience can develop. This is precisely why a valve rebuild is not a job for a beginner, and why the results at Reddick Hornworks speak for themselves.
Step 5 — Nickel Plating & Final Lapping
With the copper plating complete and the rotor fitting correctly the final plating stage begins. All lapping compound is thoroughly removed using brake cleaner before any plating takes place — contamination at this stage would compromise the bond of the nickel layer.
Sulfamate Nickel Plating Rather than standard hard nickel the rotors receive a sulfamate nickel plating — the same choice made by the legendary horn builder Lawson when crafting his famous instruments. Sulfamate nickel offers several significant advantages over conventional hard nickel plating:
Low internal stress — sulfamate nickel deposits with minimal internal stress, reducing the risk of peeling or cracking over time
Superior corrosion resistance — provides a highly durable barrier against the mineral deposits and moisture that cause valve wear in the first place
Reduced friction — sulfamate nickel has a naturally lower coefficient of friction than bare brass, contributing to smoother, more responsive valve action
Better adhesion — sulfamate nickel is significantly less prone to peeling than conventional hard nickel, making it the superior choice for a long lasting rebuild
Final Hand Lapping While the nickel plating is underway the horn body is degreased in preparation for the most critical stage of the entire rebuild — final hand lapping.
Using a custom made lapping handle and Hetman 1200 grit lapping compound each rotor is hand lapped into its casing with the rotor spinning freely. This stage is done entirely by sound and feel. The pitch and smoothness of the spinning rotor tells an experienced technician exactly what is happening at the contact surfaces — and only years of hands-on experience can interpret what those sounds and sensations mean.
When the rotor is spinning with the right sound and the right feel the lapping is complete. There is no instrument, gauge, or machine that can replicate this judgment. It is pure craft.
Final Cleaning Once lapping is complete every rotor is fully degreased again. The horn body receives a thorough brake cleaner degreasing, a rinse, and a final ultrasonic cleaning to ensure every surface is completely clean before reassembly begins.
Step 6 — Assembly, Final Testing & Blessing
With the horn and valves clean and the lapping complete it is time to bring everything back together. This final stage is where all the precision work of the previous steps is verified and the horn is prepared to return to its owner.
Assembly & Lubrication The valves and levers are reassembled using fully synthetic oils of the appropriate weight for each component. New bumpers are installed and carefully trimmed to ensure correct valve alignment — a detail that affects both feel and response.
Bearing Plate Machining This is the stage where vertical play in the valves is addressed. Over time bearing plates wear and fit too loosely in the casing — sometimes because lapping in an oversized rotor has enlarged the top of the casing, and sometimes simply because they were already worn. Loose bearing plates are what cause that distinctive typewriter-like clicking sound that tells an experienced player something is wrong. Using the lathe material is carefully removed from the lip of each bearing plate until the fit is correct and all vertical play is eliminated.
Final Compression Testing With the bearings corrected each rotor is tested once more with the Leak Pro and the final compression readings are recorded. These numbers are documented alongside the initial readings taken in Step 1 — giving you a complete before and after record of exactly what was accomplished.
Slide Service The slides are greased and reinstalled. Where needed slide legs are carefully expanded to restore a proper fit. Slides with excessive wear may require additional work and any added charges will always be discussed with the customer before proceeding.
Full Horn Leak Check With everything assembled the bell is plugged and the entire horn is pressurized for a complete leak check. Every joint, brace, and seam is checked to ensure the instrument is completely airtight before the play test begins.
Mouthpiece Receiver Check The mouthpiece fit is carefully inspected. A worn or incorrectly reamed receiver can cause the horn to fail to slot correctly and create a range of playing problems that have nothing to do with the valves. If an adjustment is needed the customer is always contacted before any work is performed — the receiver is never touched without the owner's explicit approval.
The Blessing When every rotor spins freely, every reading is where it should be, every slide moves correctly, and the horn plays the way it should — it receives what we call the Reddick Hornworks blessing. Only then is the owner contacted with the good news that their horn is ready.
With regular annual cleanings the valves should remain in top playing condition for 20 years or more before another rebuild is needed.
Ready to Give Your Horn a Second Life?
If you've read through every step of this process you already understand something important — a proper valve rebuild is not a simple job. It is a precise, multi-stage process that requires specialized equipment, carefully sourced materials, and years of hands-on experience to execute correctly. Not every shop can do this work. Not every shop will be honest with you about whether you need it.
They don't call me the Valve Whisperer for nothing.
If your horn has been feeling stuffy, slow, or just not quite right — or if you simply want to know where your valves stand — reach out today. Every rebuild starts with an honest assessment and a documented compression test. If a rebuild isn't what your horn needs I'll tell you so.
Fill out the form below and tell me about your horn. I'll get back to you within one business day.
The Echo Project →
Recommended“Their attention to detail and commitment to quality truly stood out. We’ve already recommended them to others.”
– Former Customer
Get In Touch
If you're interested in working with us, complete the form with a few details about your project. We'll review your message and get back to you within 48 hours.